Wednesday, December 31, 2008

Leanne's Card Box!

Here is a really great idea created by one of my fellow stampers.

These tins are great to keep many different things in them, but the best part is that normal sized cards fit in them. Leanne saw that and decided to create a box to organize cards.

In the first picture you can see how she took her time to really make the outside of the box look very cute so that it looks great just sitting around.

In the second picture you can see how she made dividers for the inside of the box so that when she makes cards she can put them in the correct category and they are easy to find when she needs them.

Another great use with this same idea would be a recipe box. Be creative and see what you can come up with. I would love to see what you are working on and creating.

Thanks for stopping by! Have a wonderful day! Happy Stamping! Britni :)

"But you will receive power when the Holy Spirit comes on you; and you will be my witnesses in Jerusalem, and in all Judea and Samaria, and to the ends of the earth." Acts 1:8

Tuesday, December 30, 2008

Pine Tree

Have you seen this wonderful stamp set? Lovely As A Tree is a classic set that Stampin' Up has had for a very long time. I was hoping to NOT see it on the retirement list and it wasn't! I had just purchased this one right before the list came out. Remember if there is a set on that list you need to get it before they are gone for good, January 18th.

For this card I used Garden Green, Chocolate Chip, and Kraft. I used my markers to color the stamp and then stamped it on the Kraft. I used the tearing technique to tear the edge of the two layered colors. The card needed something else so I added some brads to the top, but still kept it a masculine card. I always like to come up with new cards that work for the men in our lives.

This is an easy layout to use with many different stamp sets, so be creative and try it!

Happy Stamping! Britni :)

"In the beginning God created the heavens and the earth." Genesis 1:1

Monday, December 29, 2008

Bottle Tag

Need a quick tag? I did! I bought a bottle of wine to give to some friends. I needed a quick tag to put on the bottle. I always like to add that home-made touch instead of just handing over a bottle, plate of cookies, etc.

For this tag I started off by looking through my scrap box. I found a Top Note that was already cut out of Pacific Point. I then used a rub on from the Chit Chat set and I used a Chocolate Chip one because I knew I wanted to use the Chocolate Chip ribbon. I then used some flowers from the Flower Fusion. These flowers can be used for many different things (cards, bookmarks, scrapbook pages). The Pumpkin Pie and Old Olive Flowers worked really well with these colors. I then used a small brad to put in the middle of the flowers and attach to the Top Note.

I punched a hole through the top to add the ribbon. This was a really fun tag to make and it turned out really cute.

Have a wonderful day and thanks for stopping by today.

Happy Stamping! Britni :)

"For it is by grace you have been saved, through faith, and this is not from yourselves, it is the gift of God." Ephesians 2:8

Sunday, December 28, 2008

Kindred Spirits

The name alone sold me on this stamp set. Has anyone read "Anne of Green Gables?" Anne always talked about her Kindred Spirit. The name of this set was wonderful and the second part of the set is that it had a sympathy stamp. you can see in my picture that I used the sympathy words. The other words are Kindred Spirit.

For this card I wanted to keep it simple. I layered many colors. I started with Elegant Eggplant, then Always Artichoke, and then the Very Vanilla which I stamped the beautiful branch with purple buds. I used my markers to color in the stem and the buds. I then used the Always Artichoke to stamp the message. For the ribbon I tied a little bit of Very Vanilla Grosgrain around the entire card and then I added a small piece of Natural Twine to give it more of a nature feel.

I hope you have enjoyed this card. It is a beautiful and easy to make card.

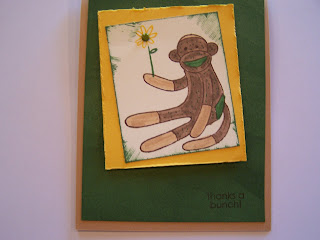
Thank you for stopping by. I hope everyone had a wonderful Christmas Celebration. I had a wonderful time with family spending time chatting, eating, and playing games. Oh yeah...I did get some really great gifts, too. My nephew seemed to love his sock monkey and by the end of the day he was giving him lots of hugs!

Happy Stamping! Britni :)

"Jesus answered, "I am the way and the truth and the life. No one comes to the Father except through me." John 14:6

Saturday, December 27, 2008

I think I'm Seeing Stars

Hello Stampers! The new year is coming and we need to start thinking about all the different cards we will need to send out to our friends and family.

For this card I used two different stamp sets. I used Starring You and Starstruck (which is retiring). The great part about using these small stamps is that they fit inside the Build-A-Brad. The Build-A-Brad enhances the color or stamped image that you place behind it. If you have never used a Build-A-Brad before please let me know and I can show you. It is an easy way to add a lot to a card. For the background and the birthday stamp I used Starring You.

With these two cards I wanted to show you how you can make the same card, but change it a little by turning the card. Sometimes I get tired of making the same card over and over so it is fun to just change it a little, but keep the same look and techniques.

I also used the same small stars, stamped them, and then used the star punch to punch them out and place them inside the card. A lot of times I forget all about the inside, but it is just as important as the outside. I love to have something inside that goes along with the outside of the card. It is that added touch that really shows them you spent time on this card.

Thank you for stopping by again. I really appreciate that you take the time to check out my blog.

Happy Stamping! Britni :)

"I am not ashamed of the gospel, because it is the power of God for the salvation of everyone who believes: first for the Jew, then for the Gentile." Romans 1:16

Friday, December 26, 2008

Christmas Keeps Going

What I love about Christmas is all the beautiful cards that come in the mail. Cards are a wonderful and thoughtful way to tell someone that you care about them. As I looked at all the cards I received from friends and family it really made me realize why I got into this business. I love sending and receiving cards and Christmas is the best time of year for that. I also realized how much my life has changed since I started working with SU! What an amazing, fun, and rewarding job/hobby this is for me. I looked at the cards that were home-made and I realized they are from all of the wonderful people I have met because of SU! Thank you to all of you!

Well, my two samples today are some wonderful cards that I received in the mail this past week. The first one with the bear on it is from Brooke. I opened this card and was just taken away. The colors, the tearing, the stamps...they just all looked really great together. She combined a lot of techniques and they look great. The second card is from Lola. I love how she used glitter to enhance her card. She also did a great job of adding the scalloped edge at the bottom of the card and adding glitter there, too. It looks great, Lola!

I hope everyone had a wonderful Christmas. Remember how wonderful it was to receive cards for this season and don't forget to send cards throughout the entire year for all those special occasions and and of course just because.

Happy Stamping! Britni

"First, I thank my God through Jesus Christ for all of you, because your faith is being reported all over the world." Romans 1:8

Thursday, December 25, 2008

Merry Christmas!

Well, here he is!!! I got him done in time for Christmas. I had a deadline, that is the only way I got him done. I will have to say that this little guy was not he most fun I have had in awhile. It took me awhile to get him done. I did sew him all by hand. I think if I were to make another one I would do some of the sewing on a machine. That would help it go a little faster. A lot of it would still need to be done by hand, but that is okay.

As I was finishing the monkey, I thought he would look great with a scarf. I took some red yarn that I already had and knitted him a nice little scarf with some fringe. That way he is nice and warm for this cold Christmas day!

This monkey is for my nephew Oen. He is a little young to know what it is, but someday he will know.


I also didn't want to leave without showing you that you two can make a sock monkey, but much quicker than I did. We have a set that is actually called Sock Monkey. I love that you can color it as a traditional Sock Monkey or change it up for a different look.

I wish you all a very Merry Christmas! Enjoy your time with your family and remember the real reason we are celebrating and giving gifts to our loved ones.

Merry Christmas! Britni :)

"So Joseph also went up from the town of Nazareth in Galilee to Judea, to Bethlehem the town of David, because he belonged to the house and line of David. He went there to register with Mary, who was pledged to be married to him and was expecting a child. While they were there, the time came for the baby to be born, and she gave birth to her firstborn, a son. She wrapped him in cloths and placed him in a manger, because there was no room for them in the inn." Luke 2:4-7

Wednesday, December 24, 2008

Georgia's Christmas Card

Merry Christmas Eve! It is here and time to start celebrating Jesus' birth. Take some time to say thank you for the sacrifice He gave for us.

The card I am showing you today was made by me friend and upline, Georgia. Her cards always look so beautiful. With this card I love how simple she kept it, but she also added that little extra to top it off. For this card she used Chocolate Chip for the background. She then cut out a Top Note on her Big Shot. Then she also punched a Scallop Circle in the Top Note to showcase the Snowman from Merry and Bright. I have not seen this done before and I love this look! She also added some chunky glitter to the snowman's brim of his stocking cap. She stamped the words from the set All Holidays. This is a very great word set. It provides you with a wonderful variety of words for different occasions. All in all the card is simple, yet very cute!

Thanks for stopping by on this busy day. I hope you are enjoying your celebrations. Keep checking back for new ideas.

Happy Celebrating! Britni :)

"
All this took place to fulfill what the Lord had said through the prophet: "The virgin will be with child and will give birth to a son, and they will call him Immanuel"—which means, "God with us." Matthew 1:22-23

Tuesday, December 23, 2008

Pati's Christmas Card

Hello Stampers! We are getting even closer to Christmas. I will be keeping my entries short and sweet so that you have plenty of time to finishing your wrapping, baking, and starting to spend time with your families.

My sample today is a Christmas card that I received from a co-worker at Apollo. Pati is a fellow stamper and I think she did a great job on this card. I love the snowmen in the center of this card and I love how she took the time to color their scarves, vests, and hats.

Thanks for stopping by. I hope you continue to stop by now and in the New Year. I hope to have some really great ideas and new techniques during 2009. I will also continue to feature other crafter's great ideas and projects. We can all learn from one another!

Happy Celebrating! Britni :)

"She will give birth to a son, and you are to give Him the name Jesus, because He will save His people from their sins." Matthew 1:21

Monday, December 22, 2008

Snowman Soup Part Two

Hello Everyone! I had so much fun making and giving people my first set of Snowman Soup that I decided to make more to give out at my family gatherings! I hope the pictures aren't too dark for you to see the details.

For this set I made boxes for all the goodies to sit in. I used my Big Shot envelope die and cut four of them using Chocolate Chip. I then was able to assemble them into a box. I love the scallops sitting up along the edge of the box. I then added some Taffeta Riding Hood Red Ribbon all the way around the box. I used my Deer Friends stamp set (hostess level two) to stamp the gingerbread boy in Close to Cocoa. I layered it with a Riding Hood Red circle behind it and placed in on the side of the box with a dimensional.

I took a closer picture of the inside. Inside each box I placed enough packets of hot chocolate depending on how many people were in each family. I used some of SU's small cellophane bags to put some marsmallows in. I then tied a coordinating ribbon to close the marshmallow bag. I then placed the same number of candy canes as the hot chocolate packets. I made ten boxes in all and it didn't really take that long. I just made an assembly line and did everything at the same time.


Thank you for stopping by today. Have a wonderful day!

Happy Stamping! Britni :)

"When they had seen Him, they spread the word concerning what had been told them about this child, and all who heard it were amazed at what the shepherds said to them." Luke 2:17-18

Sunday, December 21, 2008

Christmas Money Holder

It is getting so close to Christmas. I can't wait....it is such a fun and busy time of year. I love to see all my family and have them all in one place!


I needed a quick and easy gift card/money holder. Our small Kraft Open End Envelopes worked perfectly. All I did was cover one side with some Prestwick Designer Series Paper. I then also used a stamp from Winter Post. I colored in the words using Real Red, and the outline in Garden Green. I cut around the image and then layered it with Real Red and Garden Green Paper. For the paper I used my ticket corner punch to give it the same look as the image.

For the back of the envelope I used the same set to stamp some snowflakes, the post office stamp, and the to and from. I wanted to keep it very simple since this one was for a boy. I liked how the Prestwick paper looked great for Christmas when I added some Real Red with it, but you could also use it for many other projects that are not Christmas related.

Have fun with those last minute gifts, wrapping, and baking. Have fun with it and enjoy this wonderful time of year!

Happy stamping, crafting, sewing, wrapping, baking..... Britni :)


"So they hurried off and found Mary and Joseph, and the baby, who was lying in the manger." Luke 2:16

Saturday, December 20, 2008

Kraft Paper Packaging

Hello Everyone! I hope you are all doing well and staying warm with all this cold weather. That is winter for you. We better get ready for a nice long winter.

Last week I was able to get most of my wrapping done. I sure was happy that I already had all my tags made. This made the process go a lot faster. For these two gifts I used Kraft Wrapping paper. This is just the type of paper you would use to wrap a box to go in the mail. The best kind to get is from a dollar store because it is thinner and easier to work with.

For this packaging I used my Winter Post stamp set from the Holiday Mini Catalog. I love that this set is not only Christmas. The snowflakes and deer could be used all winter long. I then coordinated some ribbon and twine for each package. I thought they turned out simple, but cute. I know the people that I am giving these gifts to will appreciate the time I spent stamping them home-made wrapping paper.

This type of wrapping paper can be used all year long...that is the best part. You could use it for birthdays, weddings, anything that you give gifts for. Kraft wrapping paper is easy to store and easy to cut and stamp for a quick wrap.

Thank you so much for stopping by today. Have a wonderful day!

Happy Stamping! Britni :)

"When the angels had left them and gone into heaven, the shepherds said to one another, Let's go to Bethlehem and see this thing that has happened, which the Lord has told us about." Luke 2:15

Friday, December 19, 2008

Happy Snowmen

Well, I am running out of Christmas cards to share with you, so I hope you are about finished and ready to just relax and celebrate Christ's birth!

The card I am sharing with you today is a very simple card. I used Glorious Green and Real Red. My Real Red came from my Prints Pack (hostess level one). I also used a hostess level three set, Window Dressing, for the snowmen. I really like these snowmen and I also had used them on my Snowman Soup if you remember. I did my normal layering....I do this a lot as you can see, but it is a quick and easy way to make a card. I used my Horizontal Slot Punch to bring my ribbon through the card and tie it nicely in the front. The Whisper White ribbon really pops on this card.

If you have made any really great Christams projects I would love to see them. Have you knitted, sewed, stamped, scrapped? Whatever it is please share it with me. You can always e-mail the pictures. You never know you may just see your project on my blog!

Thanks for stopping by during this very busy holiday season.

Happy Creating! Britni :)

"This will be a sign to you: You will find a baby wrapped in cloths and lying in a manger." Luke 2:12

Thursday, December 18, 2008

Ho! Ho! Ho!

The time is getting closer. Santa is almost here and here is Rudolph to bring him through that foggy night.

I saw a similar card somewhere on the net and I thought it was so cute. This card is stamped using Deer Friends (hostess level two). At first I did not really like this set and I wasn't sure how to use. Well, then I earned it for FREE and I have used it a lot. It is great for quick tags and bookmarks. As you can also see it is great for the Scallop Circle and Circle Punch layering.

I stamped Santa using Riding Hood Red and then layered him. I also made him pop more by using dimensionals behind him. Then for the reindeer I used my marker and colored them in using Close to Cocoa and then stamped them. I colored in their noses and their eyes.

For the background I used Bitty Backgrounds and Riding Hood Red. This is a quick and easy card that can be made in no time.

Have fun! Britni :)

"Today in the town of David a Savior has been born to you; He is Christ the Lord." Luke 2:11

Wednesday, December 17, 2008

Bonnie's Cards

Look at these awesome cards! My mom and I received our cards from my Aunt Bonnie and they look great.

For the wreath card she used a single small stamp and formed the wreath herself. I am so impressed and what a great idea. If yo don't have a wreath make one yourself! Then she added some berries on the wreath to make the red ribbon pop.

For the snowman card she used that same stamp she used for the wreath as the background behind the snowman. You can't tell in the picture, but the snowflakes on the blue are sparkly and raised.

Thank you so much for my card and sharing your creativity with me. These cards show how exciting it is to get a home-made card in the mail. It shows that the person really cares about you to take the time to create a card just for you. Keep working on those home-made gifts and send me an e-mail with a picture of them. I would love to see what you are creating!

Thanks for stopping by today. Have a wonderful day! Happy Stamping! Britni

"Test everything, hold on to the good." 1 Thessalonians 5:21

Tuesday, December 16, 2008

Calendar Part Two

Hello Stampers and Crafters! I hope you are coming along on your Christmas crafts. I personally am behind and really need to force myself to sit down and get going.

Well, I had a Calendar Kit Bundle (Calendar Kit from mini and a Chipboard Clipboard) and a class to go with it. I had three ladies come to my class and we had a blast. Every calendar was different and beautiful in its own way. I thought I would share my mom's results with you. She always does a great job and is an inspiration to me to keep making beautiful projects.

Crystal had the idea to use the scallop edge punch on the background of the calendar and it turned out so nice that my mom and I both decided to do that, too. You can see where she used it on the front and the back of the calendar.

We then saw the great idea to take the word calendar and tie it to the ring in the clipboard. We thought it was so cute. It was on the directions that came with the kit.

I thought they all did a great job! If you would still like to order a Calendar Kit for 2009 it is not too late. You can still order it in time for Christmas or even for a New Years gift.

Thank you for stopping by today. I hope you have a wonderful week preparing for Christmas!

Happy Stamping, shopping, crafting, baking!!! Britni :)

" An angel of the Lord appeared to them, and the glory of the Lord shone around them, and they were terrified. But the angel said to them, Do not be afraid, I bring you good news of great joy that will be for all the people." Luke 2:9-10

Monday, December 15, 2008

Mom's Element

I know I have shared this project with you before, but I had to show you using this darker tile. The first Decor Element tile I made using a lighter colored tile and the Chocolate Chip. I really liked it until I saw how the Chocolate Chip looked on this tile. It looks great!

This was a project that all of my Card Club ladies got to make this month. I purchased the tiles at the best hardware store, Lowe's, for a great price. The flower is a bulk buy that demonstrators can purchase, but we have many options that would work in our Decor Elements catalog.

The first step is to lay the element down on a flat surface and using the applicator you need to rub lightly so that it comes off the grid paper and onto the sticky side. Then as my mom is demonstrating below you need to peel off the backing slowly and at an angle. Then you place it on the tile, rub it using the applicator then slowly and at an angle take off the sticky piece. Then with your finger lightly rub the element to make sure it is stuck to the surface. It is an easy process and all the ladies loved this finished project.

This is a great project to make one for youself or make several for a gift. Have fun with it and be creative.

Thanks for taking time to check out my blog. Happy Stamping! Britni :)

"Such a generation of those who seek Him, who seek your face, O God of Jacob." Psalm 24:6


Sunday, December 14, 2008

Julia's Penguin

Hello again! I know that I have been sharing other's work a lot lately, but I love for you to see all the creative ideas and people that I get to be around! Notice the title, Julia's Penguin. She loved this penguin and this was the first stamp set she bought when I got her addicted to stamping! (That is so much fun to do!)

So......here are her penguins that she used from Punch Pals for her Christmas cards.

For the first two cards she used the square technique. She was able to use a square punch which saved a lot of time rather than cutting all those squares. She then put them on a strip of paper and used the Spiral punch. It makes them look as though they are on a film strip and it is a movie. LOOOOOOVE IT! (If anyone has young children and they watch Dragon Tales....can't you just hear that one girl dragon saying that? Someone please tell me you know what I am talking about. Justin thinks I'm crazy! haha)

The third card I know took some extra time. She wanted the snowflakes to be white and they look great white! Well, she had to use the craft ink and it isn't the most fun she had ever had.
Craft ink takes a long time to dry on paper, but the result is awesome. So, she stamped several full sheet
s of her cardstock, let them dry over night, and then cut them apart. She said that helped a little. I love how she put the presents under the tree.


Great Job, Julia! Thank you so much for letting me share these with the bloggers. Also, I thank all my bloggers for stopping by. It is always great to hear your comments.

Thanks for stopping by on this cold winter day! I hope you are all enjoying the weekend!

Happy Stamping! Britni :)

"Who may ascend the hill of the Lord? Who may stand in his holy place? He who has clean hands and a pure heart, who does no lift up his soul to an idol or swear by what is false." Psalm 24: 3-4


Saturday, December 13, 2008

Crabby?

Get it while it is hot! Okay, that was cheesy, but I had to say it. The stamp set used for this recipe card is going, going, not yet gone. Crab and Company is retiring when the new catalog comes out. It is a very cute set and worked perfectly for this project. My Card Club girls are just getting fancy! Crystal was the hostess this month and she brought Crab Dip. Not only did she bring the dip, but she also brought recipe cards to go with the dip.

For the card she used Rainbow Sherbert for the background. I love those bright colors. She then printed the recipe out onto white printing paper. She stamped Jingle Shells and the crab from Crab and Company. How cute does that crab look?
Thanks for sharing this great idea with us Crystal. I bet it didn't take much time at all.
Keep being creative. I love seeing what you can create!

Now for the winners of the snowflake ornaments....Jennifer, Julia, and Betty! Congrats, ladies. I will get those to you ASAP so that you can have them for this Christmas season. Thank you so much for leaving a comment for me and for taking the time to look at my blog!

Thank you for stopping by today and seeing the creative idea for they day. Don't forget, if you have anything you would like to order it is not too late...give me a call or e-mail me.
Happy Stamping! Britni :)
"The earth is the Lord's, and everything in it, the world, and all who live in it; for He founded it upon the seas and established it upon the waters." Psalm 24:1-2

Friday, December 12, 2008

Christams Trees


Hello Stampers! Have a told you how much I love the snow?! I'm not a huge fan of the cold weather, but I'm not complaining yet. I love all the snow we keep getting!

Well, if you are short on time, but still need to make Christmas cards, here is a quick and easy card. I used Rose Red, Garden Green and Kraft. I stamped the Christmas message from Heard from the Heart and the trees are from my Loads of Love stamp set. I colored directly onto the tree stamp using my markers so I could have brown and green on them.

I then punched a couple of holes and added the Natural Twine. This is quick, easy, and cute! I love how it all came together when I was done.

I hope you are all having a wonderful holiday season. Remeber to slow down and have some snowman soup, too. Enjoy this busy time and enjoy making those home-made gifts and wrapping them (something I still need to do)!

Thanks for stopping by today! Happy Stamping! Britni :)

"Give me a sign of your goodness, that my enemies may see it and be put to shame, for you, O Lord, have helped me and comforted me." Psalm 86:17

Thursday, December 11, 2008

Quilt Inspiration!

Hello fellow stampers! This is so exciting for me to post. One of my blog watchers was inspired to make her own card. Earlier I featured a card that I called a quilt card that I had modified from another one I had seen. Well, Jennifer decided she wanted to make a card, too.

I love the snowflakes in the middle of the circle. Also, the Christmas stamp at the bottom is from Heard From the Heart. It looks great with the tones of the card. I like how she incorporated the blues to go with the snowflakes.

Great job, Jennifer! I'm glad I could inspire you to create. That is my goal with this blog. I want you to say oh that is so cute...oh, I can do that! Then you go and create it or something like it that is your style.

Have a wonderful day! Thanks again Jennifer for sharing with me.

Happy Stamping! Britni :)

"But you, O Lord, are a compassionate and gracious God, slow to anger, abounding in love and faithfulness." Psalm 86:15


Wednesday, December 10, 2008

Gift Tags

I took some time last week when we got out of school early to work on my gift tags. I purchased the Season of Cheer Rub-ons to do just this. I thought they turned out great!

The first thing I did was grab my scrap-box and looked through it for Christmas colors that would coordinate with how I was going to wrap my gifts. So, I ended up with several shades of green and red and also some Chocolate Chip. I love using my scraps since my box is overflowing most of the time.

These tags were quick and easy because most of my scraps were sizes that worked for tags and I didn't have to do a lot of cutting. Then I added some rub -ons to each tag. When I was all done I used my stamp from Winter Post that said To and From. I thought that would make it even quicker when I was ready to use them.

Later I will either add a hole and some ribbon or twine or just tap it to the package. It will all depend on how the package or bag looks.

So, dig out your scraps and take a few minutes to make your home-made tags for all your packages. That special little touch shows people that you care enough to take the time to do something just for them.

Thanks for stopping by. Happy Stamping! Britni :)


"The voice of the Lord is powerful; the voice of the Lord is majestic." Psalm 29:4

Tuesday, December 9, 2008

Snowflake Ornament

The winners (yes, I said winners...I decided to choose two!) of my snowflake contest are Jennifer and Crystal! Congratulations! I will get those snowflakes to you ASAP so that you can use them for your holiday projects.

My project for today is a Christmas ornament. I started with a circle coaster fro Olive Garden. I traced around the coaster on my Holiday Treasures Designer Series Paper. I then cut out each circle. I used my two way glue pen along the edges of the circle and sticky strip in the middle so that the circles would stay on the coaster. I also used sticky strip to place my Felt Flurry Snowflake on my coaster. For the backside of my ornament I used a Rub-on from the Season Of Cheer Rub-ons (Holiday Mini Catalog). For the top of the ornament I used the Round Tab Punch. I then used the Natural Twine to use as the hanger for the tree. It kept the ornament simple and cute!

I love how easy it is to use Rub-Ons. They go on quickly and add just that little extra needed to finish a project.


Well, here we go again...It is Christmas time and I want to do another give away. I will be choosing three lucky winners that will receive a Snowflake Ornament. All you need to do is leave a comment on this day by Friday at 8:00 p.m.

Thank you so much for stopping by today. Have a wonderful holiday season.

Happy Stamping! Britni :)

"Ascribe to the Lord, O mighty ones, ascribe to the Lord glory and strength. Psalm 29:1

Monday, December 8, 2008

Peaceful Wishes

I received this beautiful card in the mail this past week. I really need to get started on addressing my Christmas cards and get them mailed out. I'm a little further behind this year than usual.

This card was made by my Aunt Becky. This is a retired stamp set called Peaceful Wishes. She used Kraft for the background. Then for her other colors she used Chocolate Chip, Real Red, and Old Olive. I love these three colors together. After she stamped her images she used the tearing technique. It is so easy and it doesn't require any extra supplies. All you have to do is tear the paper along the edges that you want. Along the Old Olive edges she also rubbed the stamp pad along the edges so that it would pop and coordinate with the Chocolate Chip paper. I thought it turned out great!

Thanks for stopping by and I hope you are receiving beautiful Christmas cards, too!

Happy Stamping! Britni :)

"The voice of the Lord is over the waters; the God of glory thunders, the Lord thunders over the mighty waters." Psalm 29:3

Sunday, December 7, 2008

Cute and Curly

I received my bundles from Stampin' Up's amazing Christmas Sale. Stampin' Up has had so many sales and great deals since I became a demonstrator.

The bundle I used for these cards is a great bundle that is always in our catalog. The Curly Label Punch Bundle comes with four stamps and a punch that punches out each stamp perfectly.

I used Chocolate Chip paper for the background. I then used a sheet from my Ski Slope Designer Series Paper that had Chocolate Chip, Old Olive, and Whisper White on it. I then used Chocolate Chip ribbon in between the two different patterns. Then to finish it off I stamped my images onto Old Olive and used the Curly Label punch to punch out my images. I then added some Kraft paper to the inside so that it is easier to write on the inside of the card.


Thank you so much for stopping by during this busy time. I hope you are still enjoying my blog. Let me know if there is something that you would like to see, that you have a question about, or a project you have been wanting to do.

Happy Stamping! Britni :)

Ascribe to the Lord the glory due His name; worship the Lord in the splendor of His holiness." Psalm 29:2

Saturday, December 6, 2008

Chipboard Journal

Well, I told you I would get one done and I did! I had some extra time over Thanksgiving break to work on some fun projects that I had been wanting to get done. This was one of those prjects.

I love these journals. I love how versatile they can be. You can use them yourself or give them as a gift. Someone could write or draw iniside it.

For the outside of this chipboard journal I first chose my paper that I wanted to use. I chose the polka dots from the Holiday Treasures Designer Series Paper. I used a small strip of that along the edge. I was then able to decide what colors to color my stamp (the flower from Inspired by Nature) in with my markers. I used Ruby Red, Summer Sun, Chocolate Chip, and Old Olive. All these colors coordinated with my paper choice. I also stamped the words in Ruby Red. Then I used my Big Shot to cut out a Top Note then I cut my Top Note in half to fit along the edge of my journal. I then cut out the letter B using Ruby Red and more of the polka dot paper. I have been wanting to use my alphabet more often and here it is. Then for a finishing touch I used my Crop-A-Dile to punch a hole in the journal and set the Jumbo Eyelet. I then tied some Chocolate Chip ribbon so it is easy to open the journal.

I thought the outside looked really nice, but I felt like I couldn't neglect the inside. I started by stamping some flowers on some of the pages and words on other pages. By the time I was done I had stamped every page. You would want to consider who you are giving this to and decide how much stamping you want to do on the inside. This one is for me so I knew I was safe to go ahead and stamp away. This is a very easy project that doesn't require a lot of supplies. You could easily do this with some stamps and paper you already have.

As always, be creative and come up with your own ideas, too. I love to inspire and help you get those creative juices flowing.

Have a wonderful rest of the week.

Happy Creating! Britni :)

"I will sing of the Lord's great love forever, with my mouth I will make your faithfulness known through all generations." Psalm 89:1

Friday, December 5, 2008

Christmas Bag

Hello Stampers! It is time to start thinking about wrapping those Christmas gifts. Stampin' Up makes that easy. All you need are some of our gift bags, Designer Series Paper, and stamps if you would like.

I used a white gift bag from Stampin up. I then stamped using Baja Breeze and a snowflake from my Snow Swirled stamp set. The Baja Breeze coordinated with the Baja Breeze in the paper I used. The paper was from the Ski Slope Designer Series Paper (Holiday Mini Catalog). I used sticky strip to put the paper on so that it would not fall off. I then added a bow on each side on the handles with Real Red ribbon.

Now, do you see the beautiful snowflake? It just made the bag...it looks so cute! I used a snowflake from my Felt Flurries which are also in the Holiday Mini Catalog. Well, would you like to win some snowflakes? I will be giving away a few snowflakes to one lucky winner. All you need to do is leave a comment on this day by Monday night at 8:00 p.m. I will randomly choose the winner and I will get those snowflakes to you ASAP so that you can use them for your holiday projects.

If you would like to purchase some snowflakes of your own to use on oranments and gift wrapping, it is not too late. You can still place an order with myself or from my website.

Thank you so much for stopping by today. I hope that you are enjoying my holiday ideas. I hope to have some samples of some very simple gift tags soon.

Have a wonderful day! Happy Stamping! Britni :)

"Do not boast about tomorrow, for you do not know what a day may bring forth." Proverbs 27: 1

Thursday, December 4, 2008

My Holiday Table

Hello Stampers and Crafters! I know that Thanksgiving is over and we are moving onto Christmas, but I just had to share with you my table for Thanksgiving.

As you can see I used my pumpkins, name cards, and napkin rings that I featured on earlier blog posts. I also used my Big Shot to cut out the smaller Scallop Circles. I used the larger for my coaster and under the candles and the smallest for a little extra between pumpkins and candles. I really had a lot of fun doing this and in the end it looked great.

As you can see for my candle, I made it very basic. I had some candle holders from my wedding and I added a little ribbon to the bottom. It was just a nice touch to bring out the colors from other decorations on the table. Maybe this will help you get started for your Christmas table. It is so much fun to see the finished product!

Good luck planning for the upcoming holiday season. Happy Stamping! Britni :)

"Listen, my son, to your father's instruction and do not forsake your mother's teaching." Proverbs 1:6

Wednesday, December 3, 2008

Envelope Card


I am very excited about today's project! I saw this idea on a blog that I check out daily. I thought it would be something different to try. I was making this project and when I got done I thought to myself....I wonder if a gift card will fit inside this? To my surprise it did! I have had some people asking about gift card holders and I am always curious myself, too. Well, here is a really fun, easy, and unique way to wrap a gift card.

I used a the Small Open End Kraft Envelopes. I folded the envelope in half, added some Holiday Treasures Designer Series Paper to the outside, and the flap of the envelope. I thought it needed a little more so I added the Scallop Circle. I use that punch all the time! I then of course layered with the circle punches. This always just adds a little. I had ordered some rub-ons last month during the great promotion so I used the Love Always from the Chit Chat rub on assortment.

The two views below are of the inside of the envelope card. I stamped a flower from the Bella's Bloom stamp set. That is also what I used on the front of the card. You can see the how the gift card fits nicely inside. There is a lot of room to write a nice message inside.


Thank you so much for checking out this idea. If you would like to order the supplies to make this great gift card holder just let me know. Like I said they are quick and easy to make. You could make several at a time.

Have a wonderful day and Happy Stamping! Britni :)

"Let everything that has breath praise the Lord. Praise the Lord." Psalm 150:6